SSM框架整合案例

本片文章主要是对ssm框架的整合(springMVC+spring+mybatis)

1. 搭建整合环境

1.1整合说明:

编程环境:IDEA
Maven
SSM整合可以使用多种方式,咱们会选择XML + 注解的方式

1.2整合的思路

  1. 先搭建整合的环境
  2. 先把Spring的配置搭建完成
  3. 再使用Spring整合SpringMVC框架
  4. 最后使用Spring整合MyBatis框架

1.3创建数据库和表结构

本文主要是对ssm整合的一个环境搭建,所以使用了MySQL创建了一张account表进行测试

1
2
3
4
5
6
create database ssm; 
use ssm;
create table account(
id int primary key auto_increment,
name varchar(20),
money double );

1.4 创建maven工程

在这里插入图片描述
未解决maven项目刚开始创建过慢问题,我们可以创建项目的时候增加如下键值对
archetypeCatalog
internal

在这里插入图片描述
项目创建成功,创建需要的目录文件

在这里插入图片描述
然后在pom文件中导入相应的依赖jar包

1
2
3
4
5
6
7
8
9
10
11
12
13
14
15
16
17
18
19
20
21
22
23
24
25
26
27
28
29
30
31
32
33
34
35
36
37
38
39
40
41
42
43
44
45
46
47
48
49
50
51
52
53
54
55
56
57
58
59
60
61
62
63
64
65
66
67
68
69
70
71
72
73
74
75
76
77
78
79
80
81
82
83
84
85
86
87
88
89
90
91
92
93
94
95
96
97
98
99
100
101
102
103
104
105
106
107
108
109
110
111
112
113
114
115
116
117
118
119
120
121
122
123
124
125
126
127
128
129
130
131
132
133
134
135
136
137
138
139
140
141
142
143
144
145
146
147
148
149
150
151
152
153
154
155
156
157
158
159
160
161
162
163
164
165
166
167
168
169
170
171
172
173
174
<properties>
<project.build.sourceEncoding>UTF-8</project.build.sourceEncoding>
<maven.compiler.source>1.8</maven.compiler.source>
<maven.compiler.target>1.8</maven.compiler.target>
<spring.version>5.0.2.RELEASE</spring.version>
<slf4j.version>1.6.6</slf4j.version>
<log4j.version>1.2.12</log4j.version>
<mysql.version>5.1.6</mysql.version>
<mybatis.version>3.4.5</mybatis.version>
</properties>

<dependencies>
<!-- spring -->
<dependency>
<groupId>org.aspectj</groupId>
<artifactId>aspectjweaver</artifactId>
<version>1.6.8</version>
</dependency>

<dependency>
<groupId>org.springframework</groupId>
<artifactId>spring-aop</artifactId>
<version>${spring.version}</version>
</dependency>

<dependency>
<groupId>org.springframework</groupId>
<artifactId>spring-context</artifactId>
<version>${spring.version}</version>
</dependency>


<dependency>
<groupId>org.springframework</groupId>
<artifactId>spring-web</artifactId>
<version>${spring.version}</version>
</dependency>

<dependency>
<groupId>org.springframework</groupId>
<artifactId>spring-webmvc</artifactId>
<version>${spring.version}</version>
</dependency>

<dependency>
<groupId>org.springframework</groupId>
<artifactId>spring-test</artifactId>
<version>${spring.version}</version>
</dependency>

<dependency>
<groupId>org.springframework</groupId>
<artifactId>spring-tx</artifactId>
<version>${spring.version}</version>
</dependency>

<dependency>
<groupId>org.springframework</groupId>
<artifactId>spring-jdbc</artifactId>
<version>${spring.version}</version>
</dependency>

<dependency>
<groupId>junit</groupId>
<artifactId>junit</artifactId>
<version>4.12</version>
<scope>compile</scope>
</dependency>

<dependency>
<groupId>mysql</groupId>
<artifactId>mysql-connector-java</artifactId>
<version>${mysql.version}</version>
</dependency>

<dependency>
<groupId>javax.servlet</groupId>
<artifactId>servlet-api</artifactId>
<version>2.5</version>
<scope>provided</scope>
</dependency>

<dependency>
<groupId>javax.servlet.jsp</groupId>
<artifactId>jsp-api</artifactId>
<version>2.0</version>
<scope>provided</scope>
</dependency>

<dependency>
<groupId>jstl</groupId>
<artifactId>jstl</artifactId>
<version>1.2</version>
</dependency>

<!-- log start -->
<dependency>
<groupId>log4j</groupId>
<artifactId>log4j</artifactId>
<version>${log4j.version}</version>
</dependency>

<dependency>
<groupId>org.slf4j</groupId>
<artifactId>slf4j-api</artifactId>
<version>${slf4j.version}</version>
</dependency>

<dependency>
<groupId>org.slf4j</groupId>
<artifactId>slf4j-log4j12</artifactId>
<version>${slf4j.version}</version>
</dependency>
<!-- log end -->
<dependency>
<groupId>org.mybatis</groupId>
<artifactId>mybatis</artifactId>
<version>${mybatis.version}</version>
</dependency>

<dependency>
<groupId>org.mybatis</groupId>
<artifactId>mybatis-spring</artifactId>
<version>1.3.0</version>
</dependency>

<dependency>
<groupId>c3p0</groupId>
<artifactId>c3p0</artifactId>
<version>0.9.1.2</version>
<type>jar</type>
<scope>compile</scope>
</dependency>


</dependencies>


<build>
<finalName>ssmZhengHe</finalName>
<pluginManagement><!-- lock down plugins versions to avoid using Maven defaults (may be moved to parent pom) -->
<plugins>
<plugin>
<artifactId>maven-clean-plugin</artifactId>
<version>3.1.0</version>
</plugin>
<!-- see http://maven.apache.org/ref/current/maven-core/default-bindings.html#Plugin_bindings_for_war_packaging -->
<plugin>
<artifactId>maven-resources-plugin</artifactId>
<version>3.0.2</version>
</plugin>
<plugin>
<artifactId>maven-compiler-plugin</artifactId>
<version>3.8.0</version>
</plugin>
<plugin>
<artifactId>maven-surefire-plugin</artifactId>
<version>2.22.1</version>
</plugin>
<plugin>
<artifactId>maven-war-plugin</artifactId>
<version>3.2.2</version>
</plugin>
<plugin>
<artifactId>maven-install-plugin</artifactId>
<version>2.5.2</version>
</plugin>
<plugin>
<artifactId>maven-deploy-plugin</artifactId>
<version>2.8.2</version>
</plugin>
</plugins>
</pluginManagement>
</build>

编写实体类

1
2
3
4
5
6
7
8
9
10
11
12
13
14
15
16
17
18
19
20
21
22
23
24
25
26
27
28
29
30
31
32
33
34
35
36
37
38
39
40
41
42
package zzu.domain;

import java.io.Serializable;

public class Account implements Serializable {
private Integer id;
private String name;
private Double money;

@Override
public String toString() {
return "Account{" +
"id=" + id +
", name='" + name + '\'' +
", money=" + money +
'}';
}

public Integer getId() {
return id;
}

public void setId(Integer id) {
this.id = id;
}

public String getName() {
return name;
}

public void setName(String name) {
this.name = name;
}

public Double getMoney() {
return money;
}

public void setMoney(Double money) {
this.money = money;
}
}

编写dao接口

1
2
3
4
5
6
7
8
9
10
11
12
13
14
15
16
17
18
19
package zzu.dao;
import org.apache.ibatis.annotations.Insert;
import org.apache.ibatis.annotations.Select;
import org.springframework.stereotype.Repository;
import zzu.domain.Account;

import java.util.List;

/**
* controllerDao层接口
*/
@Repository
public interface AccountDao {
//查找账户
public List<Account> findAll();

//保存账户信息
public void saveAccount(Account account);
}

编写service接口和实现类

1
2
3
4
5
6
7
8
9
10
11
12
13
package zzu.servlice;

import zzu.domain.Account;

import java.util.List;

public interface AccountService {
//查找账户
public List<Account> findAll();

//保存账户信息
public void saveAccount(Account account);
}

service实现类

1
2
3
4
5
6
7
8
9
10
11
12
13
14
15
16
17
18
19
20
21
22
23
package zzu.servlice.impl;

import org.springframework.beans.factory.annotation.Autowired;
import org.springframework.stereotype.Service;
import zzu.dao.AccountDao;
import zzu.domain.Account;
import zzu.servlice.AccountService;

import java.util.List;

public class AccountServiceImpl implements AccountService {

//查找所有的账户信息
public List<Account> findAll() {
System.out.println("这是service业务层的操作");
return null
}

//保存账户信息
public void saveAccount(Account account) {

}
}

2.spring框架代码的编写

配置完基本环境和建立好必要的domain包和dao包接口之后,我们先进行spring框架的搭建

在ssmZhengHe项目中创建applicationContext.xml的配置文件,编写具体的配置信息。

applicationContext.xml的配置文件

1
2
3
4
5
6
7
8
9
10
11
12
13
14
15
16
17
18
19
20
21
22
23
24
<?xml version="1.0" encoding="UTF-8"?>
<beans xmlns="http://www.springframework.org/schema/beans"
xmlns:xsi="http://www.w3.org/2001/XMLSchema-instance"
xmlns:context="http://www.springframework.org/schema/context"
xmlns:aop="http://www.springframework.org/schema/aop"
xmlns:tx="http://www.springframework.org/schema/tx"
xsi:schemaLocation="http://www.springframework.org/schema/beans
http://www.springframework.org/schema/beans/spring-beans.xsd
http://www.springframework.org/schema/context
http://www.springframework.org/schema/context/spring-context.xsd
http://www.springframework.org/schema/aop
http://www.springframework.org/schema/aop/spring-aop.xsd
http://www.springframework.org/schema/tx
http://www.springframework.org/schema/tx/spring-tx.xsd">

<!--开启注解扫描-->
<!--配置不需要注解扫描的包,spring的注解扫描,我们需要扫描的是service层和dao层,不需要扫描Controller层,对service层和dao层使用依赖注入-->
<context:component-scan base-package="zzu">
<!--配置要忽略的注解-->
<context:exclude-filter type="annotation" expression="org.springframework.stereotype.Controller" />
</context:component-scan>


</beans>

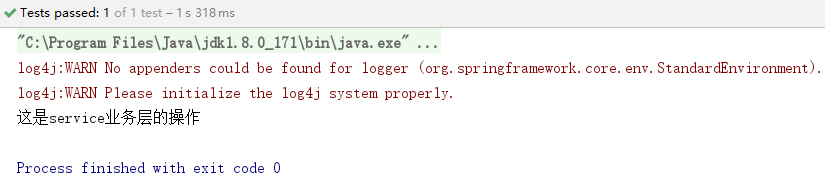
spring框架的配置文件编写完之后,我们首先对spring框架进行测试。检测一下spring的配置是否起作用。

我们配置完spring框架之后,就可以对service实现类进行依赖注入,在AccountServiceImpl.java中加入@Service(“accountService”)

在这里插入图片描述

编写测试类,看spring配置文件,使用Junit单元测试

1
2
3
4
5
6
7
8
9
10
11
12
public class testSpring {

@Test
public void test1(){
//加载配置文件
ApplicationContext ac = new ClassPathXmlApplicationContext("classpath:applicationContext.xml");
//获取对象
AccountService as = (AccountService) ac.getBean("accountService");
as.findAll();
}

}

运行结果可以看到,spring配置正常加载

在这里插入图片描述

3. springMVC框架的代码编写

首先编写springMVC的配置文件,springmvc.xml
springmvc.xml

1
2
3
4
5
6
7
8
9
10
11
12
13
14
15
16
17
18
19
20
21
22
23
24
25
26
27
28
29
30
31
32
33
34
35
36
<?xml version="1.0" encoding="UTF-8"?>
<beans xmlns="http://www.springframework.org/schema/beans" xmlns:mvc="http://www.springframework.org/schema/mvc"
xmlns:context="http://www.springframework.org/schema/context"
xmlns:xsi="http://www.w3.org/2001/XMLSchema-instance"
xsi:schemaLocation="
http://www.springframework.org/schema/beans
http://www.springframework.org/schema/beans/spring-beans.xsd
http://www.springframework.org/schema/mvc
http://www.springframework.org/schema/mvc/spring-mvc.xsd
http://www.springframework.org/schema/context
http://www.springframework.org/schema/context/spring-context.xsd">

<!--开启注解扫描,只扫描Controller包-->
<context:component-scan base-package="zzu">
<context:include-filter type="annotation" expression="org.springframework.stereotype.Controller" />

</context:component-scan>

<!-- 配置视图解析器对象 往哪一个路径去跳转-->
<bean id="viewResolver" class="org.springframework.web.servlet.view.InternalResourceViewResolver">
<!--需要解析的视图前缀文件路径-->
<property name="prefix" value="/WEB-INF/pages/"></property>
<!--controller中返回的文件的后缀名称-->
<property name="suffix" value=".jsp"></property>
</bean>

<!--前端控制器,哪些静态资源不拦截-->
<mvc:resources location="/css/" mapping="/css/**"/>
<mvc:resources location="/images/" mapping="/images/**"/>
<mvc:resources location="/js/" mapping="/js/**"/>

<!-- 配置spring开启注解mvc的支持 -->
<mvc:annotation-driven></mvc:annotation-driven>


</beans>

在web.xml文件中配置加载springmvc.xml配置文件

web.xml文件中

1
2
3
4
5
6
7
8
9
10
11
12
13
14
15
16
17
<!--配置前端控制器-->
<!-- 配置前端控制器:服务器启动必须加载,需要加载springmvc.xml配置文件 -->
<servlet>
<servlet-name>dispatcherServlet</servlet-name>
<servlet-class>org.springframework.web.servlet.DispatcherServlet</servlet-class>
<!-- 配置初始化参数,创建完DispatcherServlet对象,加载springmvc.xml配置文件 -->
<init-param>
<param-name>contextConfigLocation</param-name>
<param-value>classpath:springmvc.xml</param-value>
</init-param>
<!-- 服务器启动的时候,让DispatcherServlet对象创建 -->
<load-on-startup>1</load-on-startup>
</servlet>
<servlet-mapping>
<servlet-name>dispatcherServlet</servlet-name>
<url-pattern>/</url-pattern>
</servlet-mapping>

在web.xml中配置DispatcherServlet过滤器解决中文乱

1
2
3
4
5
6
7
8
9
10
11
12
13
<!--配置解决中文乱码的过滤器-->
<filter>
<filter-name>characterEncodingFilter</filter-name>
<filter-class>org.springframework.web.filter.CharacterEncodingFilter</filter-class>
<init-param>
<param-name>encoding</param-name>
<param-value>UTF-8</param-value>
</init-param>
</filter>
<filter-mapping>
<filter-name>characterEncodingFilter</filter-name>
<url-pattern>/*</url-pattern>
</filter-mapping>

测试SpringMVC的框架搭建是否成功

1.编写前端页面index.jsp

1
<a href="account/findAll">查询账户</a>

2. 创建AccountController类,编写方法,进行测试

1
2
3
4
5
6
7
8
9
10
11
12
13
14
15
16
17
18
19
20
21
22
23
24
25
26
27
28
29
30
package zzu.controller;


import org.springframework.beans.factory.annotation.Autowired;
import org.springframework.stereotype.Controller;
import org.springframework.ui.Model;
import org.springframework.web.bind.annotation.RequestMapping;
import zzu.domain.Account;
import zzu.servlice.AccountService;

import java.util.List;

/**
* 账户web层
*/
@Controller
@RequestMapping("/account")
public class AccountController {

/**
* 查找所有的账户信息
*/
@RequestMapping("/findAll")
public String findAll(){
System.out.println("web层查询所有的账户信息执行了");

return "list";
}

}

3.正确运行,springMVC框架配置正确

在这里插入图片描述

4. Spring整合SpringMVC的框架

spring整合springMVC框架的目的是,在controller层能调用service对象的方法,说明整合成功。

上面步骤测试的时候,我们用Junit测试加载过spring的配置文件,能正常加载,但是我们需要在项目启动的时候就去加载spring的配置文件,这样才能进行依赖注入
**
在项目启动的时候,就去加载applicationContext.xml的配置文件,在web.xml中配置 ContextLoaderListener监听器
(但是该监听器只能加载WEB-INF目录下的applicationContext.xml的配置文件,但是我们的配置文件放在了src下resources资源文件夹下,所以我们还需要配置配置文件的路径)。
**

1
2
3
4
5
6
7
8
9
<!--配置Spring的监听器,默认只加载WEB-INF目录下的applicationContext.xml配置文件-->
<listener>
<listener-class>org.springframework.web.context.ContextLoaderListener</listener-class>
</listener>
<!--设置配置文件的路径-->
<context-param>
<param-name>contextConfigLocation</param-name>
<param-value>classpath:applicationContext.xml</param-value>
</context-param>

在controller中注入service对象,调用service对象的方法进行测试
controller层
在这里插入图片描述

1
2
3
4
5
6
7
8
9
10
11
12
13
14
15
16
17
18
/**
* 账户web层
*/
@Controller
@RequestMapping("/account")
public class AccountController {
@Autowired
private AccountService accountService;
/**
* 查找所有的账户信息
*/
@RequestMapping("/findAll")
public String findAll(){
System.out.println("web层查询所有的账户信息执行了");
accountService.findAll();
return "list";
}
}

运行结果,service层的findall方法能成功执行,所用对象注入成功
在这里插入图片描述

5. 搭建mybatis框架代码

1.在web项目中src下resources文件中编写SqlMapConfig.xml的配置文件,编写核心配置文件

SqlMapConfig.xml

1
2
3
4
5
6
7
8
9
10
11
12
13
14
15
16
17
18
19
20
21
22
23
24
25
26
27
<?xml version="1.0" encoding="UTF-8"?>
<!DOCTYPE configuration
PUBLIC "-//mybatis.org//DTD Config 3.0//EN"
"http://mybatis.org/dtd/mybatis-3-config.dtd">

<configuration>

<!--连接数据库-->
<environments default="mysql">
<environment id="mysql">
<transactionManager type="JDBC"></transactionManager>
<dataSource type="POOLED">
<property name="driver" value="com.mysql.jdbc.Driver"/>
<property name="url" value="jdbc:mysql://localhost:3306/ssm"/>
<property name="username" value="root"/>
<property name="password" value="123456"/>
</dataSource>
</environment>
</environments>

<mappers>
<!--持久层所在的包-->
<!-- 该包下所有的dao接口都可以使用 -->
<package name="zzu.dao"></package>
</mappers>

</configuration>

注意:我们使用代理 dao的方式来操作持久层,所以此处 Dao的实现类就是多余的了

编写完mybatis的配置文件,我们需要mybatis配置文件是否能正常加载

首先我们需要在持久层Dao层进行查询语句的编写
在AccountDao接口的方法上添加注解,编写SQL语句
AccountDao.java

1
2
3
4
5
6
7
8
9
10
11
12
13
14
15
16
17
18
19
20
21
package zzu.dao;
import org.apache.ibatis.annotations.Insert;
import org.apache.ibatis.annotations.Select;
import org.springframework.stereotype.Repository;
import zzu.domain.Account;

import java.util.List;

/**
* controllerDao层接口
*/
public interface AccountDao {

//查找账户
@Select("select * from account")
public List<Account> findAll();

//保存账户信息
@Insert("insert into account (name,money) values(#{name},#{money})")
public void saveAccount(Account account);
}

然后编写测试类,Junit测试
testMybatis.java

1
2
3
4
5
6
7
8
9
10
11
12
13
14
15
16
17
18
19
20
21
22
23
24
25
26
27
28
29
30
31
32
33
34
35
36
37
38
39
40
41
42
43
44
45
46
47
48
49
50
51
52
53
54
55
56
57
58

package zzu.test;


import org.apache.ibatis.io.Resources;
import org.apache.ibatis.session.SqlSession;
import org.apache.ibatis.session.SqlSessionFactory;
import org.apache.ibatis.session.SqlSessionFactoryBuilder;
import org.junit.Test;
import zzu.dao.AccountDao;
import zzu.domain.Account;

import java.io.InputStream;
import java.util.List;

public class TestMybatis {

/**
* 测试账户查询的功能
*/
@Test
public void run1() throws Exception {

InputStream in = Resources.getResourceAsStream("SqlMapConfig.xml");
SqlSessionFactory factory = new SqlSessionFactoryBuilder().build(in);
SqlSession session= factory.openSession();
AccountDao dao = session.getMapper(AccountDao.class);
List<Account> list = dao.findAll();
System.out.println(list);
session.close();
in.close();
}

/**
* 添加账户信息
*/
@Test
public void run2() throws Exception {
//加载配置文件
InputStream in = Resources.getResourceAsStream("SqlMapConfig.xml");
//创建SqlSessionFactory对象
SqlSessionFactory factory = new SqlSessionFactoryBuilder().build(in);
//创建sqlsession对象
SqlSession session= factory.openSession();
//获取AccountDao接口的代理对象
AccountDao dao = session.getMapper(AccountDao.class);
//添加数据
Account account = new Account();
account.setName("熊大");
account.setMoney(300d);
dao.saveAccount(account);

session.commit();
session.close();
in.close();
}

}

经过测试,程序能正常查询出数据库中account表中的信息,mybatis框架编写正确。下面就是把mybatis框架与spring框架进行整合。

6. spring框架整合mybatis框架

spring框架与mybatis框架整合的目的就是把mybatis框架的配置文件sqlMapconfig.xml加载进spring配置文件applicationContext.xml文件中

添加过mybatis配置信息的spring配置文件applicationContext.xml完整文件如下:

1
2
3
4
5
6
7
8
9
10
11
12
13
14
15
16
17
18
19
20
21
22
23
24
25
26
27
28
29
30
31
32
33
34
35
36
37
38
39
40
41
42
43
44
45
46
47
48
49
50
51
52
53
54
55
56
57
58
59
60
61
<?xml version="1.0" encoding="UTF-8"?>
<beans xmlns="http://www.springframework.org/schema/beans"
xmlns:xsi="http://www.w3.org/2001/XMLSchema-instance"
xmlns:context="http://www.springframework.org/schema/context"
xmlns:aop="http://www.springframework.org/schema/aop"
xmlns:tx="http://www.springframework.org/schema/tx"
xsi:schemaLocation="http://www.springframework.org/schema/beans
http://www.springframework.org/schema/beans/spring-beans.xsd
http://www.springframework.org/schema/context
http://www.springframework.org/schema/context/spring-context.xsd
http://www.springframework.org/schema/aop
http://www.springframework.org/schema/aop/spring-aop.xsd
http://www.springframework.org/schema/tx
http://www.springframework.org/schema/tx/spring-tx.xsd">

<!--开启注解扫描-->
<!--配置不需要注解扫描的包,spring的注解扫描,我们需要扫描的是service层和dao层,不需要扫描Controller层,对service层和dao层使用依赖注入-->
<context:component-scan base-package="zzu">
<!--配置要忽略的注解-->
<context:exclude-filter type="annotation" expression="org.springframework.stereotype.Controller" />
</context:component-scan>

<!--Spring整合MyBatis框架-->
<!--配置连接池-->
<bean id="dataSource" class="com.mchange.v2.c3p0.ComboPooledDataSource">
<property name="driverClass" value="com.mysql.jdbc.Driver"/>
<property name="jdbcUrl" value="jdbc:mysql://localhost:3306/ssm"/>
<property name="user" value="root"/>
<property name="password" value="123456"/>
</bean>

<!--配置SqlSessionFactory工厂-->
<bean id="sqlSessionFactory" class="org.mybatis.spring.SqlSessionFactoryBean">
<property name="dataSource" ref="dataSource" />
</bean>

<!--配置AccountDao接口所在包-->
<bean id="mapperScanner" class="org.mybatis.spring.mapper.MapperScannerConfigurer">
<property name="basePackage" value="zzu.dao"/>
</bean>

<!--配置Spring框架声明式事务管理-->
<!--配置事务管理器-->
<bean id="transactionManager" class="org.springframework.jdbc.datasource.DataSourceTransactionManager">
<property name="dataSource" ref="dataSource" />
</bean>

<!--配置事务通知-->
<tx:advice id="txAdvice" transaction-manager="transactionManager">
<tx:attributes>
<tx:method name="find*" read-only="true"/>
<tx:method name="*" isolation="DEFAULT"/>
</tx:attributes>
</tx:advice>

<!--配置AOP增强-->
<aop:config>
<aop:advisor advice-ref="txAdvice" pointcut="execution(* zzu.servlice.impl.*ServiceImpl.*(..))"/>
</aop:config>

</beans>

注意:把mybatis的配置信息添加进spring进行管理之后,mybatis的配置文件sqlMapConfig.xml配置文件中,sqlMapConfig.xml的配置文件就可以删除不用了。只需要用applicationContext.xml就可以了

** 在AccountDao接口中添加@Repository注解**

1
2
3
4
5
6
7
8
9
10
11
12
13
14
15
16
17
18
19
20
21
22
package zzu.dao;
import org.apache.ibatis.annotations.Insert;
import org.apache.ibatis.annotations.Select;
import org.springframework.stereotype.Repository;
import zzu.domain.Account;

import java.util.List;

/**
* controllerDao层接口
*/
@Repository
public interface AccountDao {

//查找账户
@Select("select * from account")
public List<Account> findAll();

//保存账户信息
@Insert("insert into account (name,money) values(#{name},#{money})")
public void saveAccount(Account account);
}

在AccountServiceImpl.java中

1
2
3
4
5
6
7
8
9
10
11
12
13
14
15
16
17
18
19
20
21
22
23
24
25
26
package zzu.servlice.impl;

import org.springframework.beans.factory.annotation.Autowired;
import org.springframework.stereotype.Service;
import zzu.dao.AccountDao;
import zzu.domain.Account;
import zzu.servlice.AccountService;

import java.util.List;

@Service("accountService")
public class AccountServiceImpl implements AccountService {

@Autowired
private AccountDao accountDao;
//查找所有的账户信息
public List<Account> findAll() {
System.out.println("这是service业务层的操作");
return accountDao.findAll();
}

//保存账户信息
public void saveAccount(Account account) {
accountDao.saveAccount(account);
}
}

在AccountControlle.java中

1
2
3
4
5
6
7
8
9
10
11
12
13
14
15
16
17
18
19
20
21
/**
* 账户web层
*/
@Controller
@RequestMapping("/account")
public class AccountController {

@Autowired
private AccountService accountService;
/**
* 查找所有的账户信息
*/
@RequestMapping("/findAll")
public String findAll(Model model){
System.out.println("web层查询所有的账户信息执行了");
List<Account> list = accountService.findAll();
model.addAttribute("list",list);
return "list";
}

}

把查询的结果,在返回的list.jsp页面进行展示
list.jsp页面

1
2
3
4
5
6
7
8
9
10
11
12
13
14
15
16
17
18
19
20
21
22
23
<%--
Created by IntelliJ IDEA.
User: Lei
Date: 2019/6/1
Time: 9:49
To change this template use File | Settings | File Templates.
--%>
<%@ page contentType="text/html;charset=UTF-8" language="java" isELIgnored="false" %>
<%@ taglib prefix="c" uri="http://java.sun.com/jsp/jstl/core" %>
<html>
<head>
<title>Title</title>
</head>
<body>

<h1>查询出所有的账户信息</h1>
<c:forEach items="${list}" var="account">
${account.name}
${account.money}<br>
</c:forEach>

</body>
</html>

在这里插入图片描述
能正常运行,执行成功

以上框架整合完毕,但是只是执行查询操作,如果想进行插入更新操作,还需要配置事务
在刚才applicationContext.xml文件中已经声明过,在这里重复声明:

1
2
3
4
5
6
7
8
9
10
11
12
13
14
15
16
17
18
<!--配置Spring框架声明式事务管理-->
<!--配置事务管理器-->
<bean id="transactionManager" class="org.springframework.jdbc.datasource.DataSourceTransactionManager">
<property name="dataSource" ref="dataSource" />
</bean>

<!--配置事务通知-->
<tx:advice id="txAdvice" transaction-manager="transactionManager">
<tx:attributes>
<tx:method name="find*" read-only="true"/>
<tx:method name="*" isolation="DEFAULT"/>
</tx:attributes>
</tx:advice>

<!--配置AOP增强-->
<aop:config>
<aop:advisor advice-ref="txAdvice" pointcut="execution(* zzu.servlice.impl.*ServiceImpl.*(..))"/>
</aop:config>

保存更新操作
index.jsp中

1
2
3
4
5
6
<a>测试保存操作</a>
<form action="account/saveAccount">
姓名:<input type="text" name="name"><br>
密码:<input type="text" name="money"><br>
<input type="submit" value="保存" ><br>
</form>

AccountController.java中

1
2
3
4
5
6
7
8
9
10
11
12
/**
* 保存账户信息
* @param account
* @param request
* @param response
* @throws IOException
*/
@RequestMapping("/saveAccount")
public void saveAccount(Account account, HttpServletRequest request, HttpServletResponse response) throws IOException {
accountService.saveAccount(account);
response.sendRedirect(request.getContextPath()+"/account/findAll");
}

到此,经过测试,三个框架都能正常运行,框架整合完毕。

坚持原创技术分享,您的支持将鼓励我继续创作!
-------------本文结束感谢您的阅读-------------
0%